How to offer lunch and dinner menus with a single QR code
Does your restaurant offer a lunch special and a different dinner menu? Atablo brings your menus together on a single page accessible by QR code. Set serving hours so the current service’s menu opens first, while customers can still browse your other published menus.
Set up lunch and dinner menus in Atablo
-
Create your lunch menu
Sign in to Atablo, select your restaurant and open Menus. Choose New menu, name it “Lunch menu”, then add categories, dishes and prices.
-
Set lunch serving hours
In the editor, open the menu name editing form to access serving hours. Enter both the start and end of service, for example 12:00 to 14:30.
-
Prepare your dinner menu
Create another menu or select Duplicate in the lunch menu’s actions. The copy is unpublished. Rename it “Dinner menu” and adjust the dishes and prices.
-
Set dinner serving hours
Enter dinner hours, for example 19:00 to 23:00. Choose separate time slots for the two services.
-
Publish both menus
Review the content, publish each menu and check that your restaurant is online.
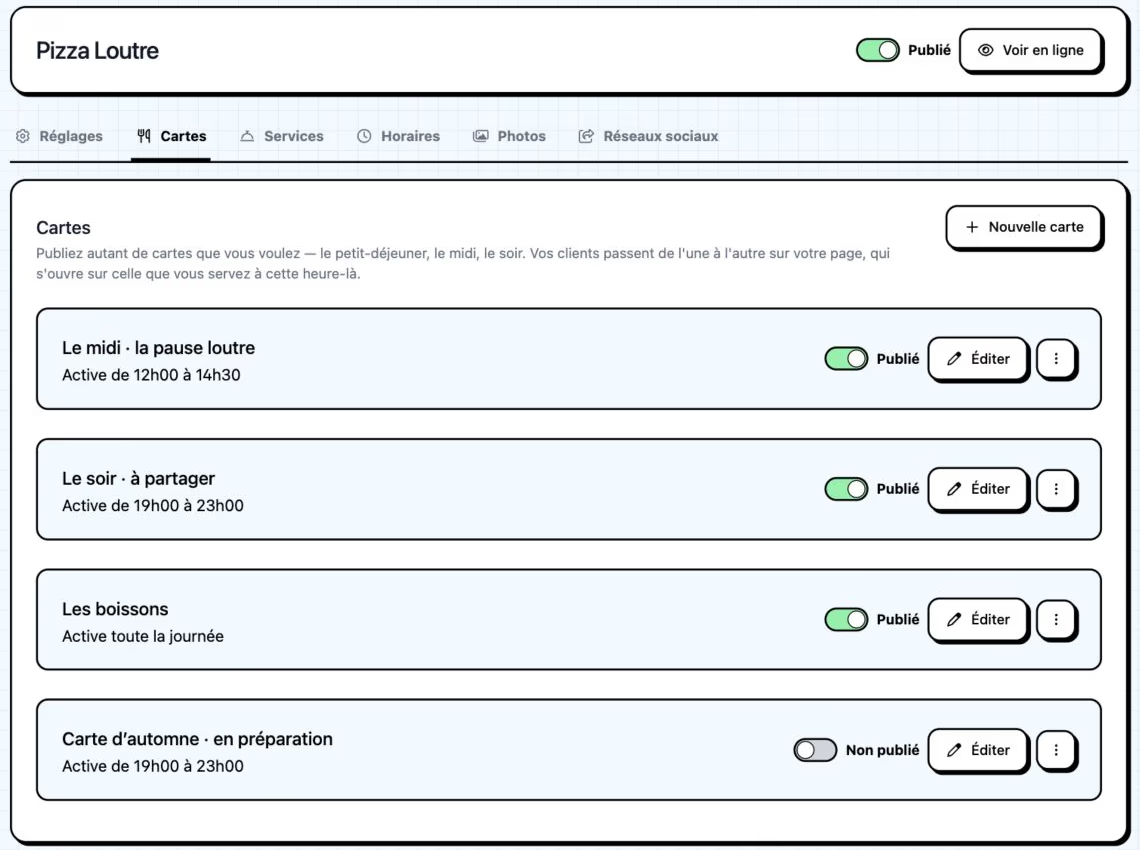
Lunch and dinner menus are published with separate serving hours. The autumn menu remains unpublished. French interface shown. Click to enlarge. -
Share your restaurant QR code
Use the same QR code on tables and in your window. Open it on your phone to check menu names and switching between menus.
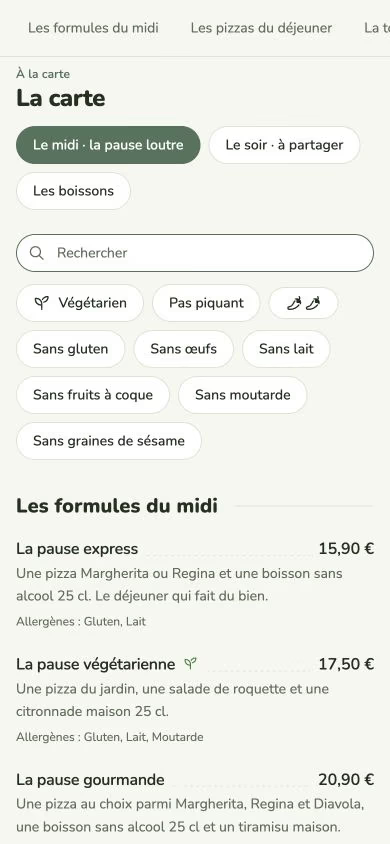
The same public page lets customers switch between lunch, dinner and drinks menus. French interface shown. Click to enlarge.
Which menu opens at each time?
During lunch hours, the page opens on the lunch menu. During dinner hours, it opens on the dinner menu.
Serving hours determine which menu opens first. All published menus remain accessible at any time. Unpublish a menu to remove it from the public page.
You can update dishes and prices without reprinting your materials: your restaurant QR code stays the same.